
CS2 Pro Settings: Best Player Configs & Video Settings
 Matt
MattIf you have ever watched a Major and wondered how top-tier players snap onto heads with such precision, the answer isn’t just raw talent. While you can’t download aim, you can certainly download the conditions that make that aim possible. Welcome to the ultimate guide on optimizing Counter-Strike 2. Whether you are grinding to improve your Premier rating or just trying to get out of Silver, your settings play a massive role in your success.
We are going to dive deep into the configurations used by the best players in the world. We aren’t just copying numbers; we are looking at why they use them so you can build the perfect setup for your playstyle.
1. Why Pro Settings Matter in Counter-Strike 2
In a tactical shooter like CS2, every millisecond counts. You might have the fastest reaction time in the server, but if your PC is rendering frames slower than your opponent’s, you are playing at a disadvantage.
The Competitive Edge
The primary goal of any competitive config is to minimize CS2 input lag and maximize frame rates. High FPS does more than just make the game look smooth; it reduces the time between your mouse movement and the action happening on screen. This is known as system latency. Pros strip away unnecessary visual clutter to ensure their crosshair goes exactly where their muscle memory intends it to go.
Consistency vs Visuals
Counter-Strike 2 looks amazing on high settings, with realistic lighting and water effects. However, for competitive play, “pretty” often means “distracting.” You need to understand the trade-off. Do you want to see the beautiful reflection of the sun on the water in Ancient, or do you want to spot the enemy hiding in the shadows? Most pros sacrifice visual fidelity for clarity and performance to ensure they can secure those CS2 ranks.
The “Meta” Shift
The transition from CS:GO to CS2 introduced the sub-tick system, replacing the old 64 and 128 CS2 tick rate debate. This shift has changed how the game registers shots and movement. Consequently, configuration needs have evolved. Settings that worked in Global Offensive might feel “floaty” now, requiring adjustments to interpolation and network settings to ensure your shots register crisply.
2. Best CS2 Video Settings for Maximum FPS & Visibility
Your video settings are the foundation of your performance. Getting this wrong can lead to stuttering or poor visibility in dark corners. Here is how to optimize your CS2 video settings for the highest frame rates.
Resolution & Aspect Ratio
The debate between 4:3 and 16:9 continues, but the data is clear: the vast majority of pros still prefer a CS2 4:3 resolution. Specifically, they use CS2 stretched res (usually 1280×960). Stretching a 4:3 aspect ratio on a widescreen monitor makes player models appear wider. This acts as a visual placebo that makes heads easier to hit. While it reduces your Field of View (FOV), making it harder to see enemies in your peripheral vision, the focus it provides for aiming is unmatched. If you prefer crisp visuals, Native 16:9 (1920×1080) is perfectly fine, but be aware that your targets will appear slimmer.
Advanced Video Settings Breakdown
To get the CS2 max FPS possible without sacrificing gameplay, use these guidelines:
- Boost Player Contrast:Enabled. This is non-negotiable. It creates a slight halo around player models, making them pop against background textures, which is critical for spotting enemies on maps with complex visuals like Inferno or Overpass.
- Multisampling Anti-Aliasing (MSAA):2x or 4x MSAA. While disabling this gives more FPS, it creates jagged edges that can look like enemy movement at long distances. 2x or 4x provides a good balance of clarity and performance.
- Global Shadow Quality:High. This might kill some FPS, but seeing an enemy’s shadow before they peek gives you a massive advantage. On maps like Nuke, shadows can win you the round.
- Model/Texture Detail & Shader Detail:Low. Keep these low to remove distracting debris and improve FPS.
- Ambient Occlusion & HDR:Disabled/Performance. These add visual depth but introduce shadows that make dark corners harder to clear. Turn them off for better visibility.
NVIDIA Reflex Low Latency
If you have an NVIDIA card, ensure this is set to Enabled + Boost. This setting significantly reduces system latency, making your mouse movements feel snappier. For a deeper dive into GPU optimization, check out our guide on best CS2 NVIDIA settings.
3. Pro Mouse Settings: DPI, Sensitivity & eDPI Explained
Finding the best sensitivity for CS2 is a personal journey, but you shouldn’t stray too far from the established norms.
Understanding eDPI
To compare sensitivity across different hardware, we use eDPI (Effective Dots Per Inch). The formula is simple: DPI x In-Game Sensitivity = eDPI. A player with 400 DPI and 2.0 sensitivity has the same eDPI (800) as a player with 800 DPI and 1.0 sensitivity.
Low vs High Sensitivity
Most professional riflers stick to an eDPI range of 700 to 1000. This lower sensitivity allows for precise micro-adjustments when holding angles or spraying down enemies. If your sensitivity is too high, you might struggle to track heads accurately. However, if you are coming from other fast-paced shooters, you might want to look at how to convert your Valorant to CS2 sensitivity.
Mouse Hertz (Polling Rate)
Standard gaming mice run at 1000Hz. However, CS2 supports higher polling rates. Many pros are moving to 4000Hz or even 8000Hz mice. This updates the cursor position more frequently, resulting in smoother tracking, provided your CPU can handle the load.
Zoom Sensitivity
For the AWPers out there, the zoom_sensitivity_ratio_mouse command is vital. Most pros leave this at 1.0, which keeps the feel consistent with your rifle sensitivity. However, some older school players prefer 0.818933027098955175, which mathematically matches the screen distance feel of 4:3 stretched.
4. Essential Crosshair Codes & Viewmodel Configurations
Your crosshair is your primary tool. If you are constantly changing it, you will never build consistency.
Static vs Dynamic
While dynamic crosshairs expand when you move or shoot (showing weapon inaccuracy), 95% of pros use static crosshairs. A static crosshair remains solid, allowing you to focus purely on aim placement without visual distractions. If you are new to customizing this, read our CS2 crosshair guide to learn the basics.
Top Pro Crosshair Codes
You can easily copy crosshair in CS2 by importing codes. Here are styles similar to what the pros use:
- Small Green Static:CSGO-7UALj-vG3mR-S8cZ6-G2tDq-23O5F (Great for precision tapping)
- Cyan Dot: Some players prefer a simple CS2 dot crosshair for ultimate visibility.
Viewmodel Positioning
The gun model takes up a large portion of your screen. Optimizing this allows you to see enemies that might otherwise be hidden behind your weapon.
- Viewmodel_fov: Set this to 68 (max) to push the gun away from your face.
- Removing Bobbing: In CS:GO, we used cl_bob commands to stop the gun from shaking while running. In CS2, the CS2 bob command options have been reduced, but you should still use viewmodel_recoil 0 to minimize the weapon reacting to recoil visual kick. You can learn more about how to change viewmodel in CS2 to find a preset like “Desktop” or “Couch” that fits your preference.
5. Top Tier Pro Player Configs (2026 Meta)
Let’s look at the specific setups of the best CS2 players dominating the scene right now.

Donk’s Settings (Team Spirit)
The young prodigy has taken the world by storm. Donk’s CS2 settings are surprisingly standard despite his chaotic playstyle. He uses a relatively low sensitivity to maintain his laser-like tracking during sprays, proving that you don’t need high sens to be an aggressive entry fragger.
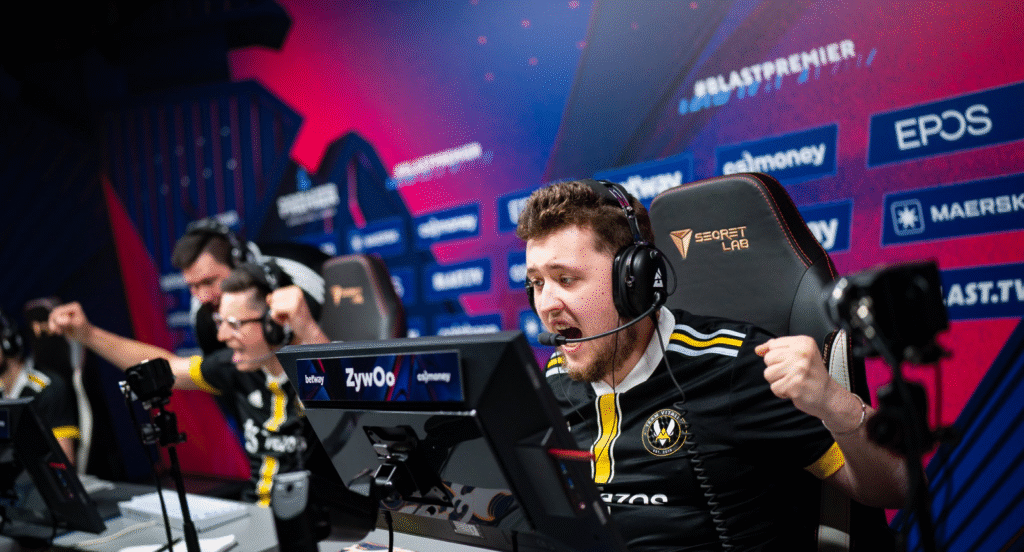
ZywOo’s Settings (Vitality)
Mathieu “ZywOo” Herbaut is a hybrid player who excels with both the AWP and the AK-47. ZywOo’s CS2 settings reflect this versatility. He uses a balanced sensitivity that allows him to flick with the sniper rifle while maintaining smooth tracking for pistols and rifles.

m0NESY’s Settings (G2)
Ilya “m0NESY” Osipov is known for his flashy plays and lightning-fast reactions. m0NESY’s CS2 settings often feature a slightly higher sensitivity than the average AWPer, facilitating those impossible flicks. He also utilizes 4:3 stretched to make those targets appear just a bit bigger.

NiKo’s Settings (G2)
Widely considered the best rifler in the world, NiKo’s aim is robotic. NiKo’s CS2 settings rely on an incredibly low sensitivity. This forces him to use his whole arm for aiming, granting him unmatched precision for one-taps and recoil control.
6. Critical Launch Options and Autoexec Commands
Optimizing CS2 happens before you even launch the game. Using the right CS2 launch options can boost FPS and stability.
Must Have Launch Options
Right click CS2 in Steam, go to Properties, and add these:
- -novid: Skips the intro video, getting you into the menu faster.
- -high: Prioritizes the CS2 process in your CPU.
- -freq 240 (or 144/360): Forces your monitor’s refresh rate.
- +exec autoexec.cfg: Forces your custom config to load.
Building an Autoexec.cfg
An autoexec file is your best friend. It saves all your binds so you don’t have to re-type them every time you launch the game. You should definitely include a jump throw bind for CS2 here, which is essential for throwing consistent smokes on maps like Mirage. If you don’t know how to set this up, check our guide on the CS2 autoexec.
Network Settings
To ensure your shots connect, you need to optimize your connection. Commands like cl_interp and rate are handled differently in CS2, but ensuring you have a stable connection is key. If you are experiencing rubber-banding, you might need to look into how to fix packet loss in CS2.
7. Optimizing External Hardware & NVIDIA Control Panel
Finally, we need to look outside the game. Your hardware needs to be running at peak potential.
Digital Vibrance
CS2 can look a bit washed out. In your NVIDIA Control Panel (or AMD equivalent), crank your Digital Vibrance up to 75% or even 100%. This makes colors more saturated, helping player models stand out against the grey and brown textures of maps like Dust 2.
Refresh Rate
It sounds silly, but double-check that your monitor is actually running at its maximum Hz. Windows updates can sometimes reset this to 60Hz. You need a high refresh rate monitor to keep up with the pros; check out our list of best monitors for CS2 if you are looking to upgrade.
NVIDIA 3D Settings
In the NVIDIA Control Panel, set “Power Management Mode” to Prefer Maximum Performance. This ensures your GPU doesn’t downclock during a match, preventing random frame drops.
By following this guide and tailoring these settings to your hardware, you are removing every technical excuse. The rest is up to you, time to hit the CS2 aim training map and start clicking heads!